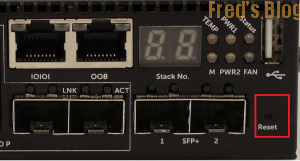
這台設備也算是少碰了,有機會玩到就把他給記錄下來
1. Console 登入
2.建立admin使用者
3.建立vlan & 設定vlan ip
4.設定Telnet登入
5.設定OOB IP (管理Port)
6.設定Default Route
7.設定Port channel
8.設定802.1Q Trunk Port
9.設定Stacking
10.更新Firmware
11.設定存檔 & 恢復預設值 & 還原設定檔
1. Console 登入
Console Port |O|O|
|
Setting
|
Value
|
|
Speed
|
1200-115200
|
|
Data Bits
|
8Bit
|
|
Parity
|
None
|
|
Stop Bits
|
1
|
|
Flow Control
|
NO
|
2.建立admin使用者
console(config)#username admin password 123456 privilege 15 encrypted
3.建立vlan & 設定vlan ip
建立vlan 101
console(config)#vlan 101
設定untaged port
console(config)#interface gigabitethernet 1/0/46
console(config-if-Gi1/0/46)#switchport access vlan 101
設定 vlan interface ip
console(config)#interface vlan 101
console(config-if-vlan101)#ip address 192.168.101.1 255.255.255.0
4.設定Telnet登入
console(config)#line telnet
console(config-telnet)#login authentication default
5.設定OOB IP (管理Port)
console(config)#interface out-of-band
設定IP、MASK、Gateway
console(config-if)#ip address 10.192.1.85 255.255.255.0 10.192.1.126
查看OOB Port
console(config)#show interfaces status | include oob
6.設定Default Route
console(config)#ip route 0.0.0.0 0.0.0.0 192.168.1.1
查看路由表
console#show ip route
7.設定Port channel
選擇30-34 port
console(config)#interface range gigabitethernet 1/0/30-34
綁定為channel 10
console(config-if)#channel-group 10 mode active
查看Port channel
console#show interfaces port-channel 10
8.設定802.1Q Trunk Port
console(config)#interface gigabitethernet 1/0/30
console(config-if-Gi1/0/30)#switchport mode trunk
console(config-if-Gi1/0/30)#switchport trunk allowed vlan 1,10,20,30
查看Port 狀態
console#show interfaces port-channel 10
9.設定Stacking
需要相同Firmware 關機接上Stack cable 3台接線方式 Unit 1 接 Unit2 接Unit3 接Unit1
開機後只有Master Switch 可以透過Console & OOB 登入,而開機時預設是比較系統Mac address 來決定哪一台Switch為Master
console#show switch
查看stack port狀態
console#show switch stack-ports
強制設備Failover
console(config)#stack
console(config-stack)#initiate failover
確認Master Switch是否已經轉換
console#show switch
當有多台Switch stack 時,可以指定Failover 發生後指定Master Switch
console(config)#stack
指定Unit 1 為Stanby
console(config-stack)#standby 1
console#show switch
10.更新Firmware
Firmware 儲存有Active & Backup兩個位置
查看目前Firmware版本,開機會使用Active Firmware
console#show version
下載新版本Firmware (需登入)
http://www.dell.com/support/home/us/en/19/product-support/product/networking-n3000-series/drivers
下載完成後,需要建立TFTP Server or FTP or HTTP Server
複製
console#copy tftp://192.168.191.180/N3000_N2000v6.2.1.6.stk backup
console#show version
使用Backup Firmware後重開
console#boot system backup
console#reload
console#show version
11.設定存檔 & 恢復預設值 & 還原設定檔
備份running-config檔案至tftp server
console#copy running-config tftp://10.192.1.54
備份running-config檔案至 USB
copy running-config usb://config/20150727
恢復預設值
a. 開機透過Boot Utility Menu 恢復預設值
b. 面板Reset 恢復預設值
c. 系統指令 恢復預設值
a. 開機透過Boot Utility Menu 恢復預設值
b. 面板Reset 恢復預設值
c. 系統指令 恢復預設值
console#erase startup-config
還原設定檔
copy tftp://10.192.1.54/20150724 running-config
Refer:
User Guide
ftp://ftp.dell.com/manuals/all-products/esuprt_ser_stor_net/esuprt_networking/esuprt_net_fxd_prt_swtchs/networking-n3000-series_Administrator%20Guide3_en-us.pdf
LACP
http://www.dell.com/Support/Article/us/en/19/HOW10364
Stack
http://www.dell.com/support/Article/us/en/19/HOW10356/EN

